How to Make Apple Juice at Home (Fresh & Natural Guide)
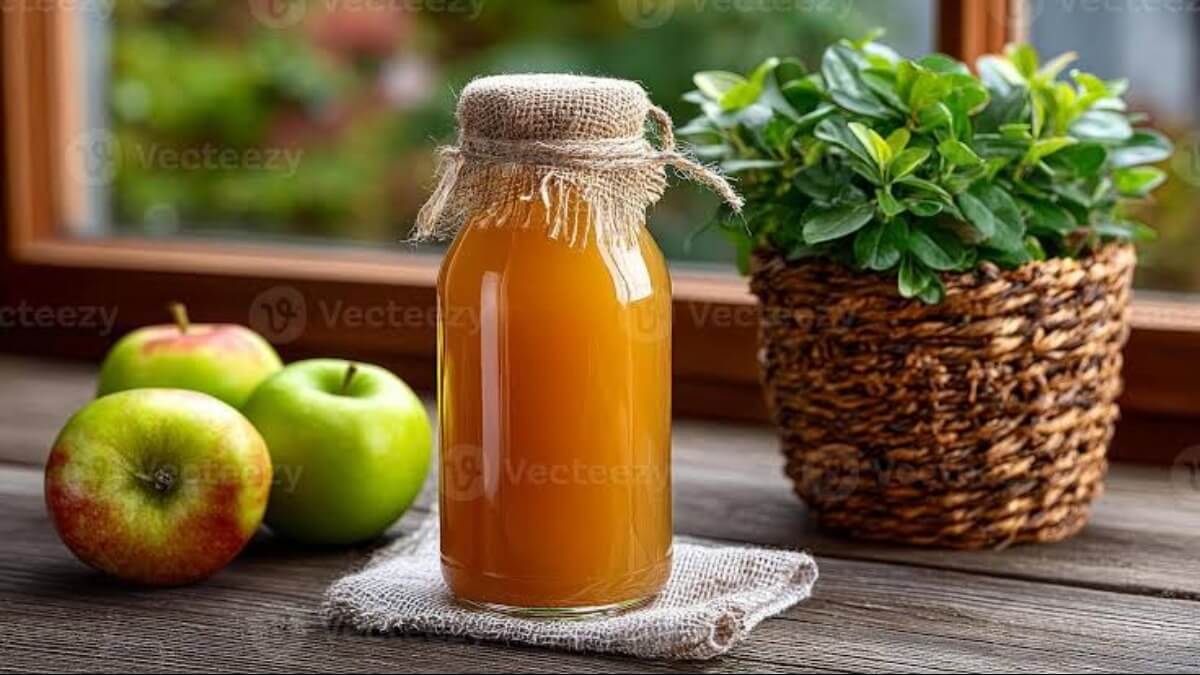
There is nothing like the refreshing taste of a cold glass of fresh fruit juice. When you learn how to make apple juice at home, you unlock vibrant flavors and wholesome nutrition. Store-bought options often sit on supermarket shelves for months and are loaded with added sugars, artificial preservatives, and synthetic flavorings that dilute the fruit’s natural goodness. By controlling the juicing process in your kitchen, you ensure every sip is packed with pure, natural ingredients.
Making apple juice from scratch is a rewarding experience. It is a wonderful activity to share with family members of all ages and dietary backgrounds. Whether you want a fun weekend kitchen project or want to add more fresh produce to your daily routine, this guide covers everything you need to know. You do not need professional culinary skills or expensive equipment to start. From selecting the perfect mix of sweet and tart apples to choosing the best extraction method for your kitchen, you are about to master homemade juicing. Let us explore the journey of turning whole fruits into a golden, refreshing beverage.
Why You Will Love Making Homemade Apple Juice
Making your own beverages at home offers many benefits. The most immediate is the unparalleled taste. Commercial juices undergo pasteurization and filtering to extend shelf life. While these processes make products safe for storage, they often strip away the fruit’s bright, complex flavors. When you juice an apple in your kitchen, you capture the volatile essential oils and delicate aromas that cannot survive factory processing.
Another major benefit is having control over your ingredients. Dietary needs and preferences vary widely. When you make your own juice, you decide exactly what goes into your glass. You can choose organic apples to minimize pesticide exposure and keep the recipe free of added sugars, relying on the fruit’s natural sweetness. This makes the beverage a great option for people managing sugar intake or parents seeking healthier alternatives for children.
Making your own juice also lets you experiment with custom blends. You are not limited to single flavor profiles sold in stores. You can adjust sweetness and tartness by mixing apple varieties until you find your favorite combination. Preparing food from scratch fosters a deeper connection to the ingredients we consume. It encourages mindful eating and drinking by helping us appreciate the natural gifts of fresh produce.
The Health Benefits of Fresh Apple Juice
Drinking freshly pressed apple juice is a great way to hydrate while delivering a concentrated dose of essential nutrients. Apples are rich in vitamins and minerals that support wellness. One prominent nutrient is Vitamin C. This antioxidant supports your immune system, helping your body ward off illnesses. It also promotes healthy skin by aiding cellular repair.
In addition to Vitamin C, fresh apple juice contains significant amounts of potassium. In addition to Vitamin C, fresh apple juice contains significant potassium. Potassium helps regulate fluid balance, muscle contractions, and nerve signals. Adequate potassium intake is linked to improved cardiovascular health and better blood pressure management. Because fresh juice retains much of its natural water content, it is also very hydrating. Proper hydration supports energy, cognitive function, and digestion throughout the day. called polyphenols. These natural antioxidants help protect your cells from oxidative stress and harmful inflammation. While whole apples contain the highest concentration of these beneficial compounds within their skin, a significant amount transfers into your fresh juice during the extraction process. To explore the specific scientific properties of these nutrients in greater detail, you can read this comprehensive overview on the Healthline guide to apple juice benefits. Remember that while fruit juice is a healthy addition to a balanced diet, it is best enjoyed in moderation alongside whole fruits, which provide essential dietary fiber.
Choosing the Best Apples for Your Juice
The secret to a great glass of juice lies in the ingredients you choose. Not all apples are equal for liquid extraction. Some yield abundant sweet nectar, while others offer a sharp, tangy bite that balances flavor. The best homemade juices usually use a blend of two or three apple varieties. Here is a breakdown of the best varieties to look for on your next grocery trip or farmers market visit.
Sweet Apple Varieties
If you prefer a naturally sweet beverage without added sweeteners, these varieties should be the base of your recipe.
- Gala Apples: Gala apples are incredibly popular for a good reason. They have a crisp texture and a mild, inherently sweet flavor profile. They yield a generous amount of juice, making them a highly efficient choice for home processing. Their subtle floral notes add a lovely aroma to the final product.
- Fuji Apples: Originating in Japan, Fuji apples are famous for their dense flesh and exceptionally high sugar content. They are among the sweetest apples available on the market. Using Fuji apples ensures a robust, candy-like sweetness that people of all ages adore. They also store very well in cool conditions.
- Honeycrisp Apples: As their name suggests, these apples offer a perfect balance of honeyed sweetness and a refreshing crunch. They are exceptionally juicy. While they can sometimes be slightly more expensive than other varieties, their superior flavor and high liquid yield make them a premium choice for artisanal homemade beverages.
- Red Delicious: While often criticized for having a mealy texture when eaten raw after long storage, Red Delicious apples actually perform quite well in a juicer. They provide a straightforward and classic sweet base that pairs beautifully with sharper flavors.
Tart and Tangy Apple Varieties
To prevent your drink from tasting flat or overly sugary, you need to introduce a touch of refreshing acidity. Tart apples add the brightness needed to elevate the flavor profile.
- Granny Smith Apples: These iconic, bright-green apples are the undisputed champions of tartness. They have a sharp and acidic bite that perfectly cuts through the heavy sweetness of varieties like Fuji or Gala. Adding just one or two Granny Smith apples to your batch will instantly transform a basic juice into a complex and refreshing gourmet drink.
- Pink Lady Apples: Also known as Cripps Pink, these apples offer a wonderful middle ground. They are famously effervescent, boasting a lively and tart flavor that finishes with a lingering sweetness. They add a beautiful rosy tint to your juice and provide a vibrant depth of flavor.
- Braeburn Apples: Braeburns have a rich, almost spicy flavor, complemented by crisp acidity. They are incredibly aromatic. Including a Braeburn in your mixture introduces a traditional autumn cider character to your freshly pressed beverage.
Crafting the Perfect Blend
For the ultimate flavor experience, never rely on just one type of apple. A widely recommended ratio is 3 parts sweet apples to 1 part tart apples. For example, blending three sweet Gala apples with one sharp Granny Smith apple yields a perfectly balanced, sweet-and-tangy drink. Feel free to experiment and adjust these ratios based on your personal taste preferences and the seasonal availability of local produce.
Essential Equipment You Need to Make Fresh Apple Juice
One common misconception about homemade juicing is that you must invest hundreds of dollars in specialty gadgets. While professional appliances speed up the process, they are not required. You can easily create a delicious beverage with tools you likely already have in your kitchen.
Electric Juicers: If you plan on making juice a regular part of your daily routine, investing in a dedicated machine is highly recommended. There are two main types to consider. Centrifugal machines are fast and generally more affordable. They use a rapidly spinning blade to chop the fruit and push the liquid through a fine mesh filter. Masticating machines operate much more slowly. They use a rotating auger to gently crush and squeeze the fruit. While masticating models are more expensive, they extract a higher yield of liquid and produce less heat, which helps preserve sensitive vitamins and enzymes.
High-Speed Blenders: A standard kitchen blender is a phenomenal alternative for those who do not own a specialized juicer. High-speed models are ideal because they can quickly pulverize raw fruit into a very fine puree. When using a blender, you are essentially creating a thick fruit smoothie that you will then manually filter.
Straining Tools: If you choose the blender method or the stovetop method, you will need a reliable way to separate the liquid from the solid fruit pulp. A fine mesh sieve or wire strainer is a great starting point. For a completely smooth, pulp-free result, use a piece of fine cheesecloth, a clean flour sack towel, or a specialized nut milk bag. These fabric filters let you squeeze the puree tightly to extract every last drop of liquid.
Step-by-Step Guide: Method 1 Using a Juicer
Using a dedicated electric juicer is the fastest and most straightforward way to process fresh fruit. This method requires minimal preparation and yields a clear, vibrant liquid in just minutes.
Step 1: Wash and Prepare Your Fruit
Begin by thoroughly washing your apples under cold running water. Because you will be processing the skins, it is crucial to remove any dirt, wax, or residual pesticides. Using a vegetable brush can help scrub away stubborn wax coatings. Once clean, slice the apples into pieces small enough to fit comfortably through the feeding chute of your specific machine.
Step 2: Remove the Seeds and Core
While some heavy-duty commercial machines can handle whole apples, it is always best practice to remove the core and seeds. Apple seeds contain trace amounts of a compound called amygdalin. When crushed, amygdalin can release minimal amounts of cyanide. While you would need to consume a massive quantity of seeds for this to become genuinely dangerous, removing them ensures absolute safety. It prevents any bitter flavors from altering your drink.
Step 3: Process the Apples
Turn your machine on and slowly feed the apple slices down the chute. Use the provided plastic plunger to gently push the fruit towards the blades or auger. Do not force the fruit too quickly, as this can jam the motor and reduce your overall liquid yield.
Step 4: Stir and Enjoy
As the liquid pours into the collection pitcher, you might notice a layer of foam forming on the surface. This is completely normal and occurs when air mixes with the natural plant proteins. You can stir the foam right in or skim it off the top with a spoon if you prefer a clearer appearance. Pour the beverage into a chilled glass and serve immediately for the freshest possible taste.
Step-by-Step Guide: Method 2 Using a Blender
If you do not own specialty equipment, you can still achieve incredible results using a standard kitchen blender. This method takes a little bit more manual effort, but it is highly effective and accessible to almost everyone.
Step 1: Clean and Chop
Start by washing your produce thoroughly. Core the apples to remove the seeds and the tough fibrous center. Next, chop the fruit into small cubes. The smaller you chop the pieces, the easier it will be for your blender blades to process them smoothly. Leaving the nutrient-rich skins on is highly recommended to maximize the health benefits and add beautiful color.
Step 2: Blend the Fruit
Place your diced fruit into the blender pitcher. To help the blades catch solid pieces and start pureeing, add a splash of cold, filtered water—about one-quarter cup. Turn your blender to its highest setting and blend until the mixture reaches a thick, uniform applesauce consistency. If the motor struggles or blades get stuck, pause, scrape down the sides with a rubber spatula, add a tiny splash of water, and resume blending.
Step 3: Set Up Your Straining Station
Place a large, clean mixing bowl on your kitchen counter. Set a fine mesh sieve directly over the bowl. For the smoothest possible texture, drape a large piece of clean cheesecloth or a specialized nut milk bag inside the sieve.
Step 4: Filter the Puree
Carefully pour the thick fruit puree from the blender into your fabric-lined sieve. Gather the corners of the cheesecloth or the bag’s drawstrings to completely enclose the pulp. Using your clean hands, begin to twist the fabric and squeeze firmly. Work slowly and apply steady pressure to force the liquid through the cloth’s tiny holes while trapping the fibrous solids inside. Continue squeezing and twisting until the remaining pulp feels completely dry and crumbly to the touch.
Step 5: Serve or Store
Discard the dry pulp or save it for an eco-friendly recipe. Pour the freshly strained liquid into a glass and enjoy the fruits of your labor.
Step-by-Step Guide: Method 3 The Stovetop Approach
The stovetop boiling method is perfect for processing very large batches of fruit, especially if you have an abundant autumn harvest from a local orchard. This technique closely mimics the traditional process for making rustic apple cider.
Step 1: Prep and Boil
Wash, core, and roughly chop your apples. You do not need precise cuts for this method. Place all chopped pieces into a large, heavy-bottomed stockpot. Pour in just enough fresh water to barely cover the fruit. Avoid drowning the pieces, as this will dilute the final flavor.
Step 2: Simmer Until Soft
Place the stockpot on your stove over medium-high heat and bring the water to a gentle boil. Once boiling, reduce the heat to low, cover the pot with a tight-fitting lid, and let the mixture simmer for about twenty to thirty minutes. You want the fruit to become incredibly soft and mushy.
Step 3: Mash the Fruit
Carefully remove the pot from the heat. Using a potato masher or a large wooden spoon, aggressively mash the softened fruit directly in the hot water. This step helps break down the plant matter’s cellular structure, releasing the maximum amount of flavor and natural sugars into the surrounding liquid.
Step 4: Strain the Hot Mixture
Set up a large bowl with a fine mesh strainer lined with cheesecloth. Carefully ladle or pour the hot, mashed mixture into the strainer. Because the mixture is hot, do not squeeze it with your bare hands right away. Allow it to sit and naturally drip for at least an hour. Once it has cooled to a safe temperature, gently squeeze the cloth to extract the remaining drops.
Step 5: Chill Before Serving
Because this liquid has been heated, it is best enjoyed warm as a comforting autumn treat or chilled completely in the refrigerator for a refreshing cold drink.
Exciting Flavor Variations to Elevate Your Drink
Once you master the basic extraction process, you can start treating your kitchen like a gourmet juice bar. Apples have a wonderfully versatile flavor profile that pairs beautifully with a wide variety of herbs, spices, and other produce.
- The Ginger Zing: For a spicy, warming kick, add a small half-inch piece of fresh, peeled ginger root to your juicer or blender with the fruit. Ginger adds a robust, fiery note that aids digestion and provides a morning energy boost.
- The Citrus Burst: Apples naturally oxidize and turn brown when exposed to air. Adding the juice of half a fresh lemon or lime not only prevents this browning but also adds a brilliant, zesty brightness that perfectly balances the natural sweetness.
- The Root Vegetable Blend: To drastically increase the nutritional value of your beverage, consider tossing in a peeled carrot or a small chunk of raw beetroot. Carrots add a mellow, earthy sweetness alongside a generous dose of beta-carotene. Beetroot provides an earthy depth and turns the liquid into a stunning, vibrant magenta masterpiece.
- The Spiced Autumn Cider: If you want to capture the cozy essence of fall, sprinkle a pinch of high-quality ground cinnamon and a tiny dash of nutmeg directly into your freshly pressed liquid. Stir well to incorporate the spices. This is especially delicious if you slightly warm the beverage before serving on a chilly evening.
How to Store and Preserve Your Homemade Juice
Because your homemade creation does not contain any of the chemical preservatives found in commercial products, its shelf life is relatively short. Proper storage techniques are crucial for maintaining food safety and optimal flavor.
Refrigeration Guidelines: After extraction, transfer the liquid into an airtight container. Glass mason jars or bottles with tight lids are best, as glass does not absorb odors or stain. Store the sealed jars in the coldest part of your refrigerator. For optimal taste and nutrition, consume the beverage within 48 to 72 hours.
Preventing Oxidation: Your golden liquid will likely turn brown after a few hours. This natural chemical reaction is called oxidation. To slow it dramatically, stir in 1 tablespoon of fresh lemon juice per quart of apple juice. The ascorbic acid in citrus helps preserve color without significantly altering the taste.
Freezing for Long-Term Storage: If you have a large surplus, freezing is a great preservation option. Pour the liquid into freezer-safe containers, leaving at least 1 inch of headspace. The liquid expands as it freezes, and without headspace, glass jars can shatter. You can keep containers frozen for up to four months. When ready to enjoy, move the container to the refrigerator and thaw overnight.
Eco-Friendly Ideas for Leftover Apple Pulp
Whether you use a specialized machine or a blender, you will have a substantial amount of solid, fibrous pulp. Throwing this byproduct away wastes excellent dietary fiber and flavor. Adopting a zero-waste mindset in the kitchen is easy with these creative recycling ideas.
Boost Your Baked Goods: The leftover pulp retains a delicate fruity flavor and moisture. You can fold half a cup of this pulp into recipes for muffins, pancake batter, or quick breads. It adds texture and a hidden boost of healthy fiber to your baked treats.
Enhance Your Breakfast: Stir a generous spoonful of fresh pulp into a warm bowl of oatmeal or overnight oats. Add a dash of cinnamon and a drizzle of natural maple syrup for a healthy, apple-pie-flavored breakfast that will keep you full until lunchtime.
Create Homemade Fruit Leather: Spread the fibrous puree into a thin, even layer on a baking sheet lined with parchment paper. Bake at the lowest temperature for several hours until completely dehydrated, slightly tacky, and pliable. Cut the dried sheet into strips for a healthy, chewy snack that children love.
Feed Your Garden or Pets: If you do not want to cook or bake, leftover material makes an excellent addition to your compost bin. It breaks down rapidly, returning nutrients to the soil. Alternatively, many dogs enjoy small amounts of plain fruit pulp mixed into their kibble as an occasional treat. Always ensure no seeds remain before feeding it to pets.
Frequently Asked Questions (FAQ)
Here are detailed answers to some of the most common questions people ask when exploring how to make fruit beverages at home.
Do I need to peel the apples before juicing them?
No, you absolutely do not need to peel the fruit. In fact, nutritionists recommend leaving the skins intact. The vibrant skins contain the highest concentration of beneficial vitamins, essential minerals, and dietary fiber. Leaving the peels on also infuses your final beverage with a much more complex flavor and a beautiful, rich color. Just ensure you wash the fruit’s exterior thoroughly to remove any agricultural residue or wax.
How long does homemade apple juice last in the fridge?
Because it lacks artificial preservatives, your fresh creation is highly perishable. When stored in a tightly sealed, airtight glass jar in the coldest section of your refrigerator, it will stay fresh and safe to drink for up to three days. For the absolute peak flavor and maximum nutrient retention, it is always best to consume it within the first twenty-four hours after pressing.
Is homemade apple juice actually healthier than store-bought options?
Yes, in almost all cases, making it yourself is the much healthier choice. Commercial products are pasteurized at extremely high temperatures, which unfortunately destroy many sensitive vitamins and beneficial natural enzymes. Store-bought versions also frequently contain massive amounts of refined added sugars or high-fructose corn syrup. When you prepare it in your own kitchen, you retain more of its natural nutrients and consume no artificial additives.
Why did my fresh apple juice turn brown so quickly?
The browning process is caused by a perfectly natural chemical reaction called oxidation. When the fruit’s internal cells are crushed and exposed to oxygen, enzymes called polyphenol oxidases react, turning the plant tissue brown. This is exactly the same process that causes a sliced apple to turn brown on your cutting board. While the brown color might look slightly unappealing, the beverage is still completely safe, highly nutritious, and delicious.
Can I make this recipe without adding any water?
If you are using a dedicated electric juicer, you do not need to add any water. The machine efficiently extracts the pure liquid from the plant structure entirely on its own. However, if you are using the kitchen blender method, you must add a very small splash of water at the very beginning of the process. Without this tiny amount of liquid, the blender blades will just spin uselessly and fail to pull the solid chunks down into a smooth puree.
What is the absolute best apple variety to use?
There is no single perfect variety, as personal taste varies widely. However, culinary experts generally agree that the best results come from blending different types together. Combining sweet varieties like Fuji, Honeycrisp, or Gala with a tart variety like Granny Smith creates a wonderfully balanced, multidimensional flavor profile that cannot be achieved with just one type of fruit.
Conclusion
Learning how to make apple juice at home is a simple, healthy, and incredibly rewarding culinary skill. By stepping away from the processed and artificially sweetened options at the grocery store, you gain total control over the ingredients you feed your body. Whether you choose to invest in a high-speed masticating machine or simply use your trusty kitchen blender and a piece of cloth, the results are always vibrant and delicious. The next time you have a bowl of crisp apples sitting on your kitchen counter, skip the standard snacking routine. Take a few minutes to press them into a glass of pure, liquid gold. Your taste buds and your body will genuinely thank you for the extra effort. Happy juicing!